Page 1 of 2
Bobbitt Brewery - Single Tier 3 Pump System
Posted: Fri Jun 24, 2011 12:09 pm
by brewdude
I finally brewed my first batch with the BCS!!!
My design was inspired by JonW single tier 3 pump system:
http://www.embeddedcontrolconcepts.com/ ... f=16&t=342
My goal was to have an almost completely automated system, where I didn’t have to switch hoses, I could set temperature set points and have the system hold the temp. I also wanted to be able to do back to back brews on the same day, so be able to be boiling one batch while mashing the next, etc.
I have listed all the parts with links at the end of this article.
I used Google SketchUp to design my system in 3D:
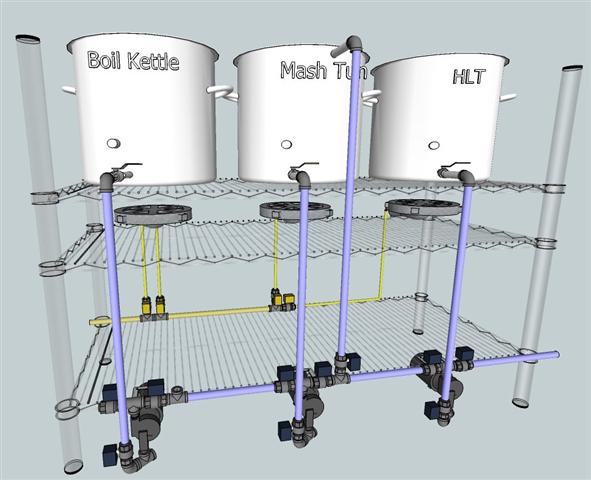
- Brewery in Google Sketchup
- Brewery (Small).jpg (38.4 KiB) Viewed 36971 times
I have a natural gas setup, so I went with 3 burners (a small one for the Mash Tun). Each burner has its own 12v solenoid gas valve and water-heater type pilot light (all the pilot lights are connected to another gas valve, I am not using thermocouples, just lighting the pilots at the start of the brew day). All 3 kettles are 15 gallons. Because the Mash Tun is direct fired, I will recirculate while mashing so I don’t scorch the wort when the Mash Tun burner is on.
Gas Valve and Liquid Valves:
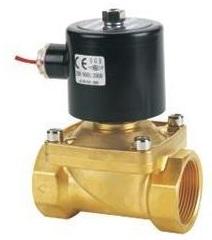
- Air Solenoid
- Air Solenoid (Mobile).JPG (7.12 KiB) Viewed 36971 times

- Water Ball Valve
- Ball Valve (Mobile).JPG (12.5 KiB) Viewed 36971 times
Different from Jon, I decided to only have one liquid return to the top on the mash tun, and not have one for the Boil Kettle and HLT. I can fill the Boil Kettle and HLT by going up through their pumps into the kettle outlet. I have 3 March 809 pumps all connected with a common liquid line running horizontally. The output from each kettle goes into the pump from the bottom. The output for each pump goes to the common liquid line. The common liquid line is connected on the right to a water hose, and on the left to a Shirron Plate chiller.
Re: Bobbitt Brewery - Single Tier 3 Pump System
Posted: Fri Jun 24, 2011 12:10 pm
by brewdude
For each pump setup, I have 3 12v electronic ball valves. One at the pump input (coming from the kettle output), and two on either side of the pump output on the common liquid line, so I can pump one way, while blocking the other way (as an added benefit I didn’t realize until brewing, I can pump either way, i.e. from the MT to the HLT, when I added to much water to the MT). For the Mash Tun, there is an additional 12v electronic ball valve for the return line to the top of the Mash Tun where it connects to a Blichman Auto Sparge. I have three temperature sensors now (HLT, MT, and MT Pump), but plan on adding one to the boil kettle, and one to the plate chiller output.
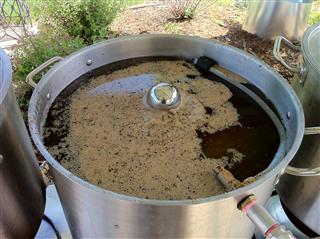
- Auto Sparge
- IMG_0991 (Mobile).JPG (30.97 KiB) Viewed 36971 times
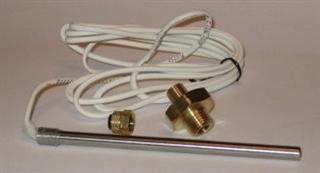
- Temp Sensor
- Temp Probes (Mobile).jpg (7.32 KiB) Viewed 36971 times
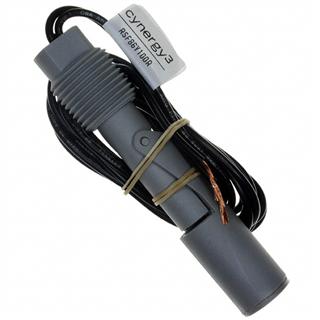
- Float Switch
- FloatSwitch (Mobile).JPG (11.45 KiB) Viewed 36971 times
Re: Bobbitt Brewery - Single Tier 3 Pump System
Posted: Fri Jun 24, 2011 12:12 pm
by brewdude
On the electrical side, I used an Orbit sprinkler control box to mount the BCS, relay boards, and switches. The box is heavy plastic and weather proof, plus has a GFCI two-outlet receptacle, so it was easy to wire up.

- Control Box
- Sprinkler Box (Mobile).jpg (6.6 KiB) Viewed 36971 times
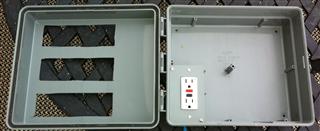
- Cutouts
- IMG_0539 (Mobile).JPG (11.24 KiB) Viewed 36971 times
Re: Bobbitt Brewery - Single Tier 3 Pump System
Posted: Fri Jun 24, 2011 12:12 pm
by brewdude
I used 3-way lighted rocker switches, so I can set each one to Off, On, and Computer Controlled. This way I can always use the manual mode if the computerized system doesn’t work. Plus, the red lights show me when the computer is trying to turn on a device, so I can do dry run throughs, and see what the computer is trying to do without actually controlling the devices. There are 18 switches in total, 10 for liquid ball valves, 4 for gas valves, 3 for pumps, and one for system on/off. The switches are mounted in 3 brackets inserted into cutouts I made on the sprinkler box lid.
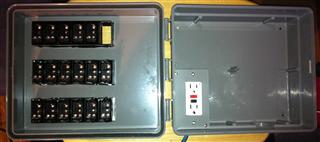
- Box Open
- IMG_0543 (Mobile).JPG (11.22 KiB) Viewed 36971 times
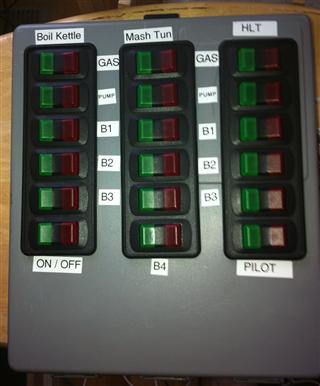
- Lights Off
- IMG_0601 (Mobile).JPG (18.81 KiB) Viewed 36971 times
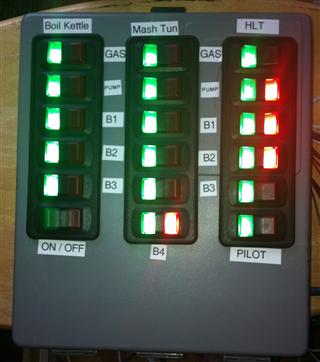
- Lights On
- IMG_0604 (Mobile).JPG (18.67 KiB) Viewed 36971 times
Re: Bobbitt Brewery - Single Tier 3 Pump System
Posted: Fri Jun 24, 2011 12:13 pm
by brewdude
Re: Bobbitt Brewery - Single Tier 3 Pump System
Posted: Fri Jun 24, 2011 12:14 pm
by brewdude
The sprinkler box has two built-in electrical outlets. I plugged the BCS 5v power supply into one, and a 12V power supply to the other. The three pumps are connected to 25A Solid State Relays in their own breaker box (I wanted to isolate the 120V from the 12V systems).
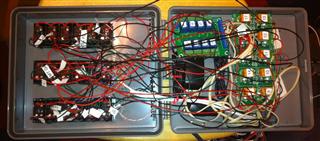
- Wired Box
- IMG_0600 (Mobile).JPG (15.95 KiB) Viewed 36971 times
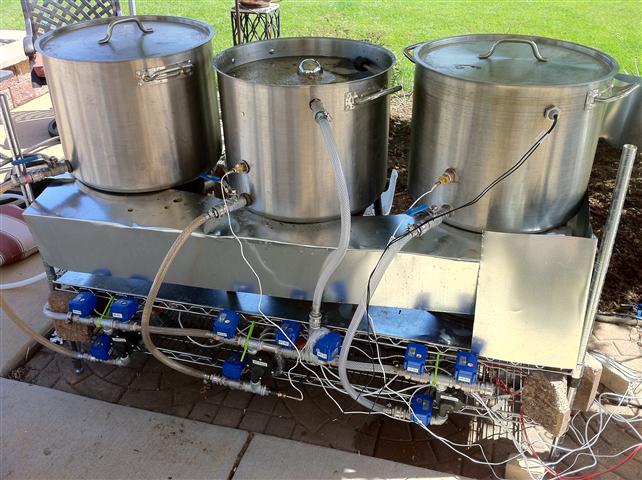
- System
- IMG_0993 (Small).JPG (80.13 KiB) Viewed 36971 times
Re: Bobbitt Brewery - Single Tier 3 Pump System
Posted: Fri Jun 24, 2011 12:15 pm
by brewdude
Re: Bobbitt Brewery - Single Tier 3 Pump System
Posted: Fri Jun 24, 2011 12:16 pm
by brewdude
Problems I ran into:
I had a huge problem trying to line up all the pipe fittings for the horizontal water line. I couldn’t get all the valves and openings to be at the right angle. So I switched the hard pipe between pumps to a braided hose, so it was easier to line things ups.
I need a fan in the control box, my 12V power supply cut out when it got too hot in there.
My brew stand was a total disaster. The wire racks just won’t take the weight or heat. I need to switch to a welded one, but I don’t know how to weld. For now, I am using bricks to support the wire stand.
Re: Bobbitt Brewery - Single Tier 3 Pump System
Posted: Fri Jun 24, 2011 12:16 pm
by brewdude
Parts List:
3 – Brew Kettles, $187, Northern Brewer,
http://www.northernbrewer.com/brewing/1 ... gapot.html
1 – False Bottom for Mash Tun, $103.99, Northern Brewer,
http://www.northernbrewer.com/brewing/f ... gapot.html
1 - BCS-462, $345, Embedded Control Concepts -
http://www.embeddedcontrolconcepts.com/
3 - Temperature Probes, $16 ea, Embedded Control Concepts
3 – 25A Solid State Relays, $13 ea, Embedded Control Concepts
1 – 10 way 12V Relay Board, $48.50, Denkovi,
http://www.denkovi.com/product/18/10-re ... t-12v.html
1 – 8 way 12V Relay Board, $31.99, Hivtronix,
http://stores.ebay.com/Hivitronix
18 – Lighted 3-way rocker switches CW123-ND, $7.22, Digikey,
http://www.digikey.com/
3 – Mounting Bracket for 6 switches 432-1108-ND, $9.75, Digikey ,
http://www.digikey.com/
1 – Float Switch 725-1010-ND, $15.43, Digikey ,
http://www.digikey.com/
1 – Buzzer 102-1629-ND, $3.16, Digikey ,
http://www.digikey.com/
Orbit Sprinkler Timer Box,$34.25 , Home Depot,
http://www.homedepot.com/h_d1/N-5yc1v/R ... reId=10051
1 – Steel Electrical Box, $16.41 ,
http://www.lowes.com/pd_31735-76863-TL4 ... facetInfo=
Wire Shelf from Home Depot or Lowes, can’t remember.
10 – 12V SS Motorized Ball Valves $22 ea : CWX-15Q ½” 12VDC
http://tfjt.en.alibaba.com/
3 – 12V Solenoid Gas Valves, $35 ea, NuSolis,
http://stores.ebay.com/NuSolis
3 - March 809 Pumps $134 -
http://www.northernbrewer.com/default/m ... -plug.html
1 - Blichman AutoSparge -
http://www.blichmannengineering.com/aut ... parge.html
Re: Bobbitt Brewery - Single Tier 3 Pump System
Posted: Sat Jun 25, 2011 8:03 pm
by JonW
Cool! I put a lot of thought into how my system would operate and I'm happy to see that others are adopting aspects of it.
brewdude wrote:Different from Jon, I decided to only have one liquid return to the top on the mash tun, and not have one for the Boil Kettle and HLT. I can fill the Boil Kettle and HLT by going up through their pumps into the kettle outlet. I have 3 March 809 pumps all connected with a common liquid line running horizontally.
Just FYI on my logic why I return to the top of all kettles... For the HLT, I like to keep the water circulating so that there isn't any temperature stratification in the kettle. This ensures that the temperature is consistent throughout the kettle. For the BK, I have a whirlpool arm in the kettle so that I can recirculate through my plate chiller and back to the kettle. I first do this to sanitize the plate chiller, but then when I turn on the counterflow water, I continue to recirc back to the kettle until the output from the chiller is low enough to then direct to the fermenter.
brewdude wrote:I had a huge problem trying to line up all the pipe fittings for the horizontal water line. I couldn’t get all the valves and openings to be at the right angle. So I switched the hard pipe between pumps to a braided hose, so it was easier to line things ups.
The threading on the pumps tends to make the fittings kind of sit to one side at an angle. One of the things that helps to hook it together is to attach the hard line between the pumps without the pumps being bolted down. Then mount the pumps and shim them at a slight angle if needed.
brewdude wrote:My brew stand was a total disaster. The wire racks just won’t take the weight or heat. I need to switch to a welded one, but I don’t know how to weld. For now, I am using bricks to support the wire stand.
Live and learn. Sorry to hear this. Like most of us, you'll be changing and updating for a while to come.